Access Denied Handler in Spring Security with Examples
Spring Security is a powerful framework that provides authentication and authorization capabilities for Java applications. When securing our applications, we often define access restrictions and permissions to protect sensitive resources. However, there may be scenarios where a user attempts to access a protected resource without the necessary permissions. In such cases, Spring Security provides an access denied handler that allows us to handle and customize the behaviour when access is denied.
The access denied handler in Spring Security provides a mechanism to define how our application should respond when a user is denied access to a particular resource. This handler can be used to redirect the user to a specific error page, display a custom message, or even return a JSON response, depending on our application’s requirements.
By implementing a custom access denied handler, we can tailor the access denied handling logic to meet our specific needs. This gives us greater control over the user experience and allows us to provide meaningful feedback to the user when access is denied.
In this tutorial, we will explore how to implement a custom access denied handler in Spring Security. We will walk through the steps of creating the handler class, configuring it in our Spring Security configuration, and customizing the behaviour to suit our application’s needs. By the end of this tutorial, you will have a clear understanding of how to handle access denied scenarios effectively in your Spring Security-enabled application. So, let’s get started!
Setup Spring Security Project:
Lets get on a step by step process to create a spring boot project using Spring Initializr and adding the required spring security dependencies.
- Open your web browser and navigate to the Spring Initializr website at https://start.spring.io/.
- Select your desired project metadata such as Group, Artifact, and Package names.
- Choose the project type (e.g., Maven Project or Gradle Project).
- Select the Spring Boot version.
- Choose the Java version and packaging file format like jar or war
- Add the necessary dependencies by searching for and selecting “Spring Security”.
- Click on the “Generate” button to generate the project structure and download the project as a zip file.
- Extract the downloaded zip file to a directory of your choice.
- Open your preferred Integrated Development Environment (IDE) and import the project as a Maven or Gradle project, depending on the configuration you selected.
pom.xml:
<?xml version="1.0" encoding="UTF-8"?>
<project xmlns="http://maven.apache.org/POM/4.0.0" xmlns:xsi="http://www.w3.org/2001/XMLSchema-instance"
xsi:schemaLocation="http://maven.apache.org/POM/4.0.0 https://maven.apache.org/xsd/maven-4.0.0.xsd">
<modelVersion>4.0.0</modelVersion>
<parent>
<groupId>org.springframework.boot</groupId>
<artifactId>spring-boot-starter-parent</artifactId>
<version>3.1.1</version>
<relativePath/> <!-- lookup parent from repository -->
</parent>
<groupId>com.example</groupId>
<artifactId>api-access-denied-handler-example</artifactId>
<version>0.0.1-SNAPSHOT</version>
<name>api-access-denied-handler-example</name>
<description>API Access Denied Handler Example</description>
<properties>
<java.version>17</java.version>
<spring-security.version>5.3.4.RELEASE</spring-security.version>
<spring.version>5.2.8.RELEASE</spring.version>
</properties>
<dependencies>
<dependency>
<groupId>org.springframework.boot</groupId>
<artifactId>spring-boot-starter-web</artifactId>
</dependency>
<dependency>
<groupId>org.springframework.boot</groupId>
<artifactId>spring-boot-starter-security</artifactId>
</dependency>
<dependency>
<groupId>org.springframework.security</groupId>
<artifactId>spring-security-web</artifactId>
<version>${spring-security.version}</version>
</dependency>
<dependency>
<groupId>org.springframework.security</groupId>
<artifactId>spring-security-core</artifactId>
<version>${spring-security.version}</version>
</dependency>
<dependency>
<groupId>org.springframework.security</groupId>
<artifactId>spring-security-config</artifactId>
<version>${spring-security.version}</version>
</dependency>
<!-- https://mvnrepository.com/artifact/javax.servlet/servlet-api -->
<dependency>
<groupId>javax.servlet</groupId>
<artifactId>servlet-api</artifactId>
<version>2.5</version>
<scope>provided</scope>
</dependency>
<dependency>
<groupId>org.springframework.boot</groupId>
<artifactId>spring-boot-starter-test</artifactId>
<scope>test</scope>
</dependency>
<dependency>
<groupId>org.springframework.security</groupId>
<artifactId>spring-security-test</artifactId>
<scope>test</scope>
</dependency>
</dependencies>
<build>
<plugins>
<plugin>
<groupId>org.springframework.boot</groupId>
<artifactId>spring-boot-maven-plugin</artifactId>
</plugin>
</plugins>
</build>
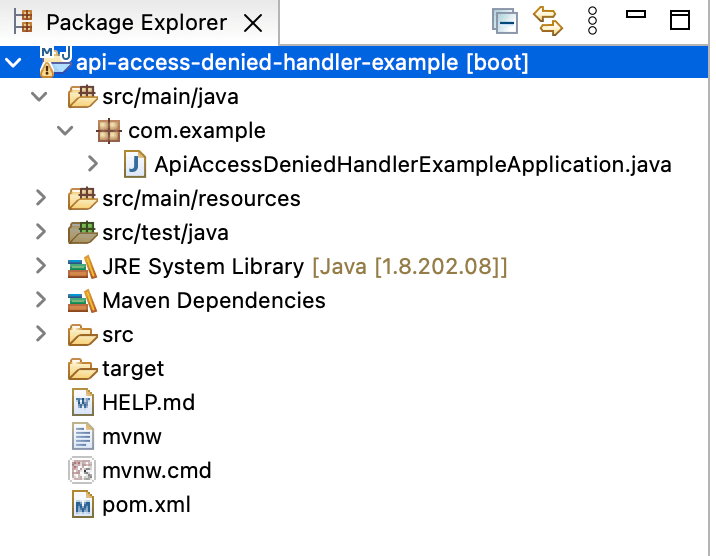
</project>Project Structure:
Implement Custom Access Denied Handler:
Create a new class called RestAccessDeniedHandler that implements the AccessDeniedHandler interface provided by Spring Security. This interface defines a single method called handle(), which is invoked when access is denied to a user.
Here’s an example of how the RestAccessDeniedHandler class can be implemented:
package com.example;

import org.springframework.security.access.AccessDeniedException;
import org.springframework.security.web.access.AccessDeniedHandler;
import org.springframework.stereotype.Component;

import javax.servlet.ServletException;
import javax.servlet.http.HttpServletRequest;
import javax.servlet.http.HttpServletResponse;
import java.io.IOException;

@Component
public class RestAccessDeniedHandler implements AccessDeniedHandler {

	@Override
	public void handle(HttpServletRequest request, HttpServletResponse response,
			AccessDeniedException accessDeniedException) throws IOException, ServletException {
		response.setStatus(HttpServletResponse.SC_FORBIDDEN);
        response.setContentType("application/json");
        response.getWriter().write("{\"error\":\"Access denied\"}");
	}
}
In this example, the handle() method sets the response status to 403 Forbidden and writes the “Access denied” message to the response in json format. You can customize this method to fit your specific requirements, such as returning a JSON response with additional information.
Configure the Access Denied Handler:
Next, you need to configure the access denied handler in your Spring Security configuration. This can be done by extending the WebSecurityConfigurerAdapter class and overriding the configure() method.
Here’s an example of how the configuration class may look like:
package com.example;

import org.springframework.beans.factory.annotation.Autowired;
import org.springframework.context.annotation.Configuration;
import org.springframework.security.config.annotation.web.builders.HttpSecurity;
import org.springframework.security.config.annotation.web.configuration.EnableWebSecurity;
import org.springframework.security.config.annotation.web.configuration.WebSecurityConfigurerAdapter;

@Configuration
@EnableWebSecurity
public class SecurityConfig extends WebSecurityConfigurerAdapter {

    @Autowired
    private RestAccessDeniedHandler accessDeniedHandler;

    @Override
    protected void configure(HttpSecurity http) throws Exception {
        http.authorizeRequests()
                .antMatchers("/api/admin/**").hasRole("ADMIN")
                .anyRequest().authenticated()
                .and()
                .exceptionHandling().accessDeniedHandler(accessDeniedHandler)
                .and()
                .httpBasic();
    }
}
In this example, we are using the accessDeniedHandler() method to specify our custom access denied handler for REST API requests. You can modify the URL permissions based on your application’s requirements.
Also, note that we are using HTTP Basic authentication for simplicity in this example. You can adapt the authentication mechanism according to your project needs, such as token-based authentication or OAuth.
That’s it! You have now implemented a custom access denied handler for a REST API in Spring Security. When a user attempts to access a protected resource without the necessary permissions, your custom handler will be invoked, and you can define the desired behavior for handling the access denied scenario.
Remember to customize the code to your specific needs and adapt the response handling based on your application requirements.
Implement Sample Rest Controller:
Here’s an example of a RestController that you can use to test the RestAccessDeniedHandler:
package com.example;

import org.springframework.web.bind.annotation.GetMapping;
import org.springframework.web.bind.annotation.RequestMapping;
import org.springframework.web.bind.annotation.RestController;

@RestController
@RequestMapping("/api")
public class SampleRestController {

    @GetMapping("/public")
    public String publicEndpoint() {
        return "Public endpoint";
    }

    @GetMapping("/admin")
    public String adminEndpoint() {
        return "Admin endpoint";
    }
}
In this example, we have a SampleRestController class annotated with @RestController to indicate that it is a REST controller component in Spring MVC.
The /api/public endpoint is mapped to the publicEndpoint() method using the @GetMapping annotation. This endpoint is a public resource that does not require any specific role or permission.
The /api/admin endpoint is mapped to the adminEndpoint() method. This endpoint is a protected resource that requires the user to have the “ADMIN” role or specific permissions.
To test the behavior of the RestAccessDeniedHandler, you can perform the following steps:
- Make a GET request to
/api/public. This should return the “Public endpoint” message, indicating successful access to a public resource. - Make a GET request to
/api/admin. Since this endpoint is protected and requires administrative privileges, if the user making the request does not have the necessary permissions, theRestAccessDeniedHandlerwill be invoked, and the response will be a 403 Forbidden status code with the “Access denied” message.
Ensure that you have configured the RestAccessDeniedHandler and other Spring Security configurations correctly for the access denied handler to be invoked.
Define Application Properties:
Here’s an example of an application.properties file to configure the RestAccessDeniedHandler in Spring Security:
# Spring Security Configuration
spring.security.user.name=admin
spring.security.user.password=admin123
spring.security.user.roles=ADMIN

# Custom Access Denied Handler
spring.security.rest.access-denied-handler=com.example.RestAccessDeniedHandler
In this example:
- The
spring.security.user.nameproperty sets the username for in-memory authentication. - The
spring.security.user.passwordproperty sets the password for in-memory authentication. - The
spring.security.user.rolesproperty sets the role(s) assigned to the user.
Ensure that you modify the values of these properties according to your application’s requirements.
The spring.security.rest.access-denied-handler property specifies the fully qualified class name of the RestAccessDeniedHandler implementation. Make sure to replace com.example.RestAccessDeniedHandler with the actual package and class name of your custom access denied handler.
You can add this configuration to your application.properties file or the corresponding configuration file for your chosen configuration format (e.g., application.yml for YAML configuration).
Remember to adjust the configuration file format (properties or YAML) if you are using a different format.
This configuration sets up the RestAccessDeniedHandler as the access denied handler in Spring Security, and it will be used to handle access denied scenarios in your REST API.
Feel free to customize the other properties and add additional configurations as needed for your application.
Test the application:
Here are some sample cURL commands that you can use to test a REST API protected by Spring Security:
cURL command for public endpoint (no authentication required):
curl -X GET http://localhost:8080/api/public
cURL command for an authenticated endpoint:
curl -X GET http://localhost:8080/api/admin -u admin:admin123
Note: Replace admin and admin123 with the actual username and password configured in your Spring Security setup.
cURL command for accessing an endpoint with invalid credentials:
curl -X GET http://localhost:8080/api/admin -u user:password
This command attempts to access the /api/admin endpoint with invalid credentials.
cURL command for accessing an endpoint without necessary permissions:
curl -X GET http://localhost:8080/api/admin
This command attempts to access the /api/admin endpoint without providing any authentication credentials.
You can modify the URLs, request methods (e.g., -X POST), request bodies (e.g., -d '{"key":"value"}'), and headers (e.g., -H 'Content-Type: application/json') based on your API’s specific requirements.
Remember to replace http://localhost:8080 with the appropriate base URL of your API.
These sample cURL commands allow you to test different scenarios such as accessing public endpoints, authenticating with valid credentials, accessing protected endpoints without authentication, and accessing protected endpoints with invalid credentials.
Feel free to adapt these commands based on your specific API endpoints and authentication requirements.


